Showing posts with label applique. Show all posts

Saturday, 7 March 2026

Applique Block - 13 inch


Simple Framed Block


This is a 13 inch block, not a traditional size, but I had leftover strips from a project, the spare fabric was 10 inch so I made them into blocks, the 10 inch squares bring the centre. You can make these blocks into pillows, runners, quilts etc. 

If desired make an appliqué and sew onto the 10 inch square, you can also embroider or just use a print you like, be creative. 

I used:

10 inch square for the centre, (4) 2.5 inch squares for the corners, (2) 2 x 10 inch side strips, (2) 10 x 13 for top & bottom strips.

To make the corners on the 10 inch square: Use 2.5 inch squares to make the corners. draw a line diagonally on the back of the 2.5 inch square, place in the corner of the 10 inch square and sew on the line. 


Trim 1/4 inch away from the newline and flip the triangle back to make the new corner, iron.  


Do this to all 4 corners. 


Not to waste fabric you can sew the cut off triangle 1/4 or 1/8 seam and make a mini half square triangle. See the bottom of the post to see what I do with them. 

Sew a 2 inch by 10 inch strip the sides of the centre square, iron


Sew a 2 inch by 13 inch strip the top and bottom, iron


Block complete. 

You can make the corners larger by using larger squares, add more strips to the sides and bottoms.. have fun. 


 To use up the mini half square triangles, lay them out in any design you wish. I like to make mini star blocks. Sew two hst together to make a flying geese. Put these around a 3.5 inch centre square, add 1.5 inch squares to the corners. I stock pile these and make pillows or use for other smaller projects. 


Happy Sewing!


Scappy Applique Block

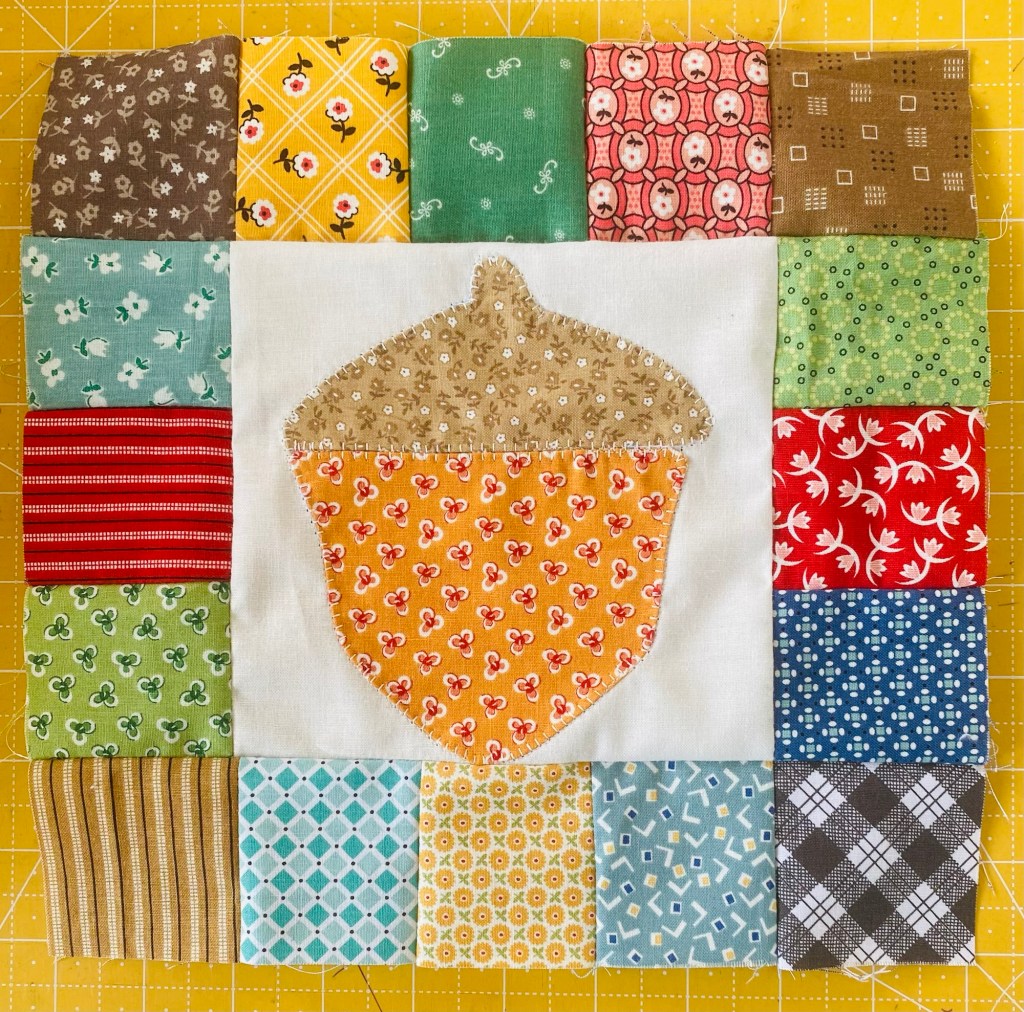
How to make a fun 10 inch patchwork block


You will need:

6.5 inch square for the centre 

16. 2.5 inch squares for the sides

An appliqué of your choice for the centre 

First using your favourite appliqué method, sew the appliqué to the center of the 6.5 inch square. You can also do an embroidery.

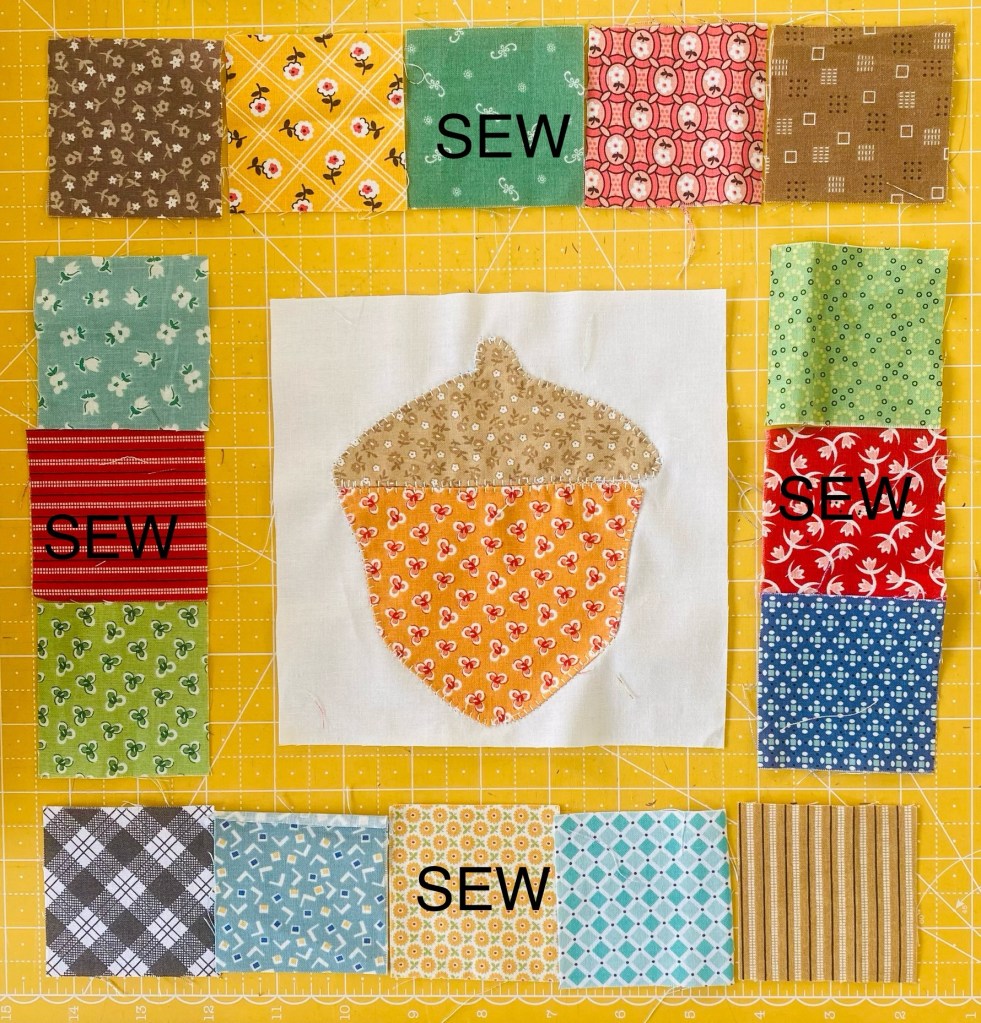
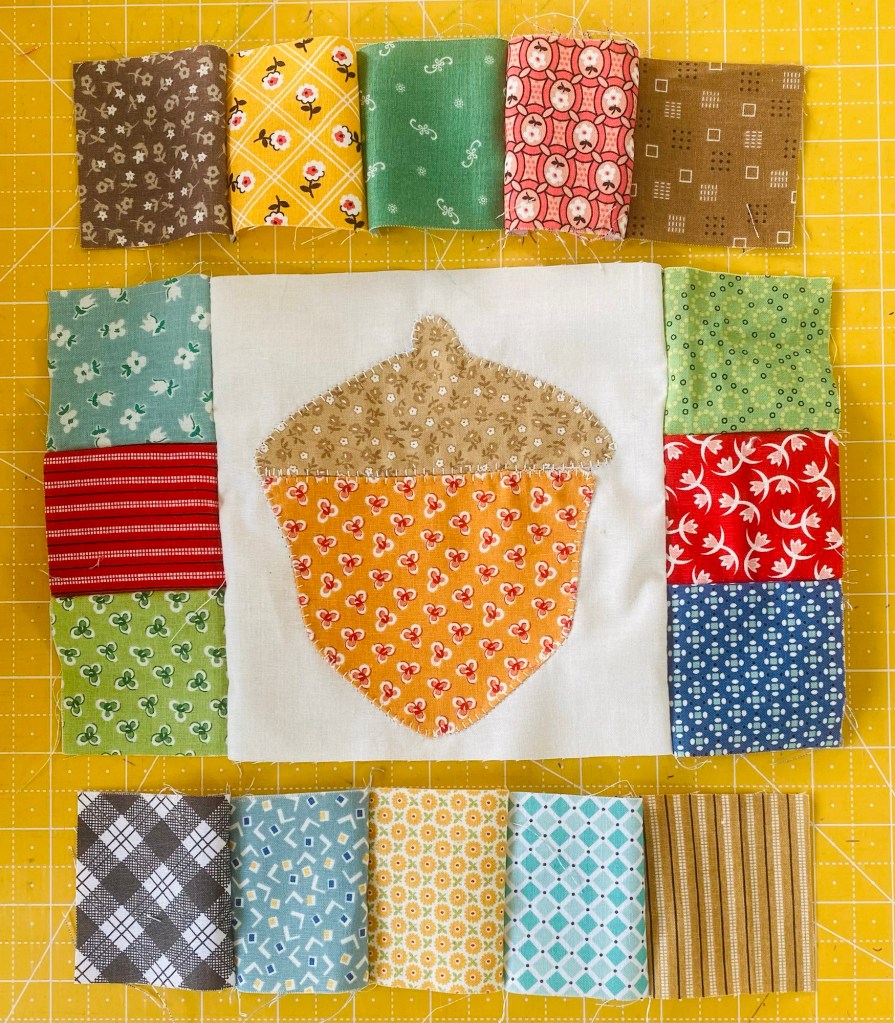
Place the 2.5 blocks around the 6.5 inch square so there are three along each side and one at each corner

Sew the sections laid out in the above picture
Sew the side strips to the centre block. Then sew the top & bottom strips

The blocks done! Use it as a quilt block, pot holder, make several and put together as a runner or quilt.

Happy sewing! Vall

Friday, 6 March 2026

Simple Napkins with Applique

How to make some fun, easy napkins!

Instead of buying napkins, this year I will be making some using different appliques and embroidery.
I cut & sewed a bunch so they are ready to be embellished. This one has an English Paper Pieced Heart, I will do some other appliqué too, can also use embroidery for a fun touch!

To make the napkins I used Essex linen. Cut to 12 inch square. You can make them any size you want. 
I forgot to prewash before sewing, but it is a good idea if you want a nice polished look after. 

Cut your squares or rectangle or whatever shape / size. Remember to factor in 1/2 inch for hem on all sides


On your ironing board, fold over and iron 1/4 inch. Press well 


Fold over 1/4 inch again and press well. Pin if you like.
Sew on the good facing side, using a 3.5mm straight stitch. You can also get creative and use a fancy stitch on your machine. 
And your done!
Embellish as desired. 


Saturday, 8 January 2022

How to sew a EPP dresden

Sewing EPP Dresdens

This is my method of sewing English paper pieced Dresdens, you can also sew them in a circle if you wish. 


Papers: 2 inch pointed Dresdens by Sue Daley Designs
This Dresden has 12 blades.


For each blade, you will need a 3 inch x 1.75 inch rectangle. 
Lay the paper down in the center and use a ruler or cut by sight 1/4 inch from the shape


Once you have the fabric trimmed, glue just inside the edge of the paper and fold all the sides over. You do not have do fold the very bottom. 


Lay the blades in a circle.


Start sewing.
Divide the circle into 4 groups of 3 blades. 
Starting with 1 group, sew with the arrows as a guide.


 Start at the top and sew to almost the bottom. bring your needle and thread across the bottom of the middle blade ready to sew the next blade on. 


This is what it looks like from the front.


Add the next blade.


Place on top of the center blade and sew from the bottom to the top. 


You will now have 1 set of 3 sewn. Repeat for the other sets.


Time to sew the circle together. 
Start with the blue like and sew together the two top pieces


Next sew on the bottom right.


Sew the last section in place


Finished Sewing!


Remove papers carefully, I like to use a knitting needle. 
Press with the iron.


Prepare the center circle.
Cut fabric making sure to leave 1/4 inch all the way around.


Glue and fold the edges over.


Press well with an iron and remove the paper. 
Press with the iron again. 


Place the Dresden on where you wish to applique it. 
You can pin it or use some water soluble glue to keep it in place.
Hand stitch in place or use a stitch on your sewing machine. 
Last place the circle in the center to cover up the messy center and sew in place.

Voila!!!