Showing posts with label scraps. Show all posts

Saturday, 7 March 2026

Regent Street Block

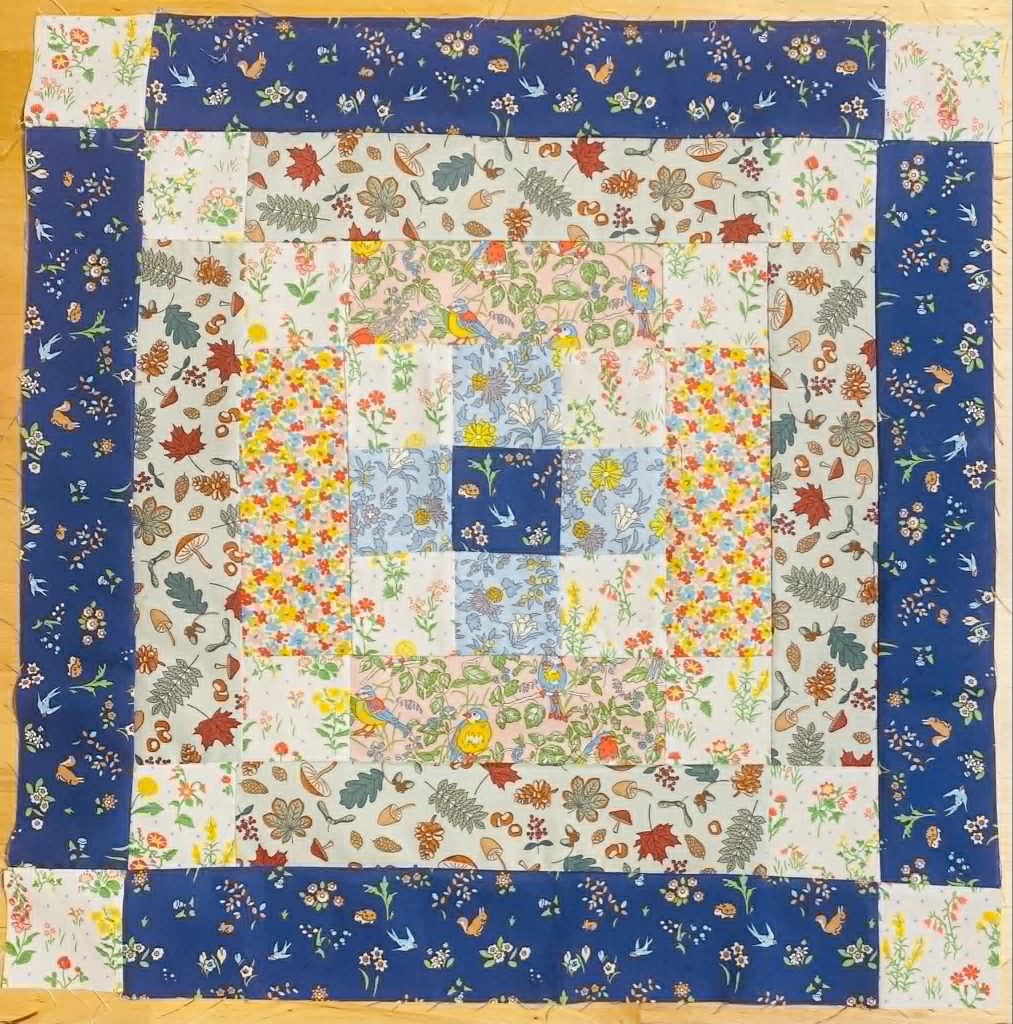
 This pillow is made with the Woodland Walk Collection by Liberty Of London, finishes at 18 inch Square. and uses 2.5 inch strips. 

 This is a great block for small pieces in your stash and can be made into quilt blocks, pillows etc.
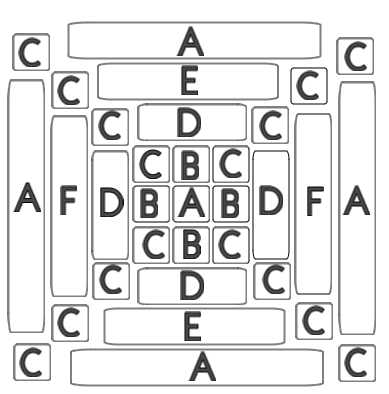
The Chart:

B: (4) 2.5 inch square

C: (16) 2.5 inch square

D: (4) 2.5 x 6.5 inch

E: (2) 2.5 x 10.5 inch

F: (2) 2.5 x 10.5 inch

To Sew:

Make the 9 patch in the center:

Sew together 2 sets of CBC and 1 set BAB.

Sew to form the 9 patch center.  

Sew 2 sets of CDC

Sew 2 D strips to the side of the 9 patch.

Sew the two CDC strips to the top & Bottom

Sew 2 sets of CEC

Sew 2 F strips to the side of the 9 patch.

Sew the two CEC strips to the top & Bottom

Sew 2 sets of CAC

Sew 2 A strips to the side of the 9 patch.

Sew the two CAC strips to the top & Bottom

Get creative and use more or less then 6 prints

Have fun sewing! Vall

Log Cabin Block - 11 inch

 I love making scrappy log cabin blocks. They can be used on their own as pot holders, mug mats or pillows, or made into quilts. 

Log cabin blocks are very versatile and y to play with. They start with a centre and work around the centre with strips. You can start on the top, side or bottom, you can use the same width strips or strips of different widths. This one is a pretty standard. 

Before you ask why the letters for the strips are not in order, the program I use sets the letters, not me.. 

F: 3.5 inch square
D: 2.5 x 3.5 strip
E: 2.5 x 5.5 inch strip (need 2)
B: 2.5 x 7.5 inch strip (need 2)
C: 2.5 x 9.5 inch strip (need 2)
A: 2.5 x 11.5 inch strip
Sew D onto F
Sew E to the bottom
Sew E to the side 
Sew B to the top
Sew B to the side
Sew C to the bottom
Sew C to the side
Sew A on the top
Finished. 

You can keep going and make it bigger if you would like. 

Make sure to iron after sewing each strip and use a 1/4 inch foot. 

Have fun making these into quilts, pillows, pot holders etc. 

Monday, 31 May 2021

Scrappy Table Mat


I love making these, they use up scraps and make the table pretty. 
I make them in all kinds of sizes, really what fits the scrap blocks or pieces I'm using 
I used them for small serving mats (under chip bowls etc) I put plants on them, picture, basically I used them where I want to protect a table, shelf etc. 
I don't use batting in mine unless its something I want to use to put a hot pot on. 

You need scrap blocks and a binding an inch larger on all sides 

Make your patchy top piece. 
Place in the center of the backing (backing wrong side up)
Pin and quilt. I usually follow grid lines, but do what you like. Leave the corners unsewn and only sew on the top piece. 


Trim the sides if you need to. Make sure there is 1 inch on each side.


Tuck the corners of the backing under the front like shown below


Fold the backing in half until it meets the edge of the front. You can use clips or iron if you want.


Fold the backing in half again, this time onto the front. The corners should be nicely mitered. 
Hand or machine stich. 


 Enjoy!