Showing posts with label quilt block. Show all posts

Saturday, 7 March 2026

Applique Block - 13 inch


Simple Framed Block


This is a 13 inch block, not a traditional size, but I had leftover strips from a project, the spare fabric was 10 inch so I made them into blocks, the 10 inch squares bring the centre. You can make these blocks into pillows, runners, quilts etc. 

If desired make an appliqué and sew onto the 10 inch square, you can also embroider or just use a print you like, be creative. 

I used:

10 inch square for the centre, (4) 2.5 inch squares for the corners, (2) 2 x 10 inch side strips, (2) 10 x 13 for top & bottom strips.

To make the corners on the 10 inch square: Use 2.5 inch squares to make the corners. draw a line diagonally on the back of the 2.5 inch square, place in the corner of the 10 inch square and sew on the line. 


Trim 1/4 inch away from the newline and flip the triangle back to make the new corner, iron.  


Do this to all 4 corners. 


Not to waste fabric you can sew the cut off triangle 1/4 or 1/8 seam and make a mini half square triangle. See the bottom of the post to see what I do with them. 

Sew a 2 inch by 10 inch strip the sides of the centre square, iron


Sew a 2 inch by 13 inch strip the top and bottom, iron


Block complete. 

You can make the corners larger by using larger squares, add more strips to the sides and bottoms.. have fun. 


 To use up the mini half square triangles, lay them out in any design you wish. I like to make mini star blocks. Sew two hst together to make a flying geese. Put these around a 3.5 inch centre square, add 1.5 inch squares to the corners. I stock pile these and make pillows or use for other smaller projects. 


Happy Sewing!


Regent Street Block

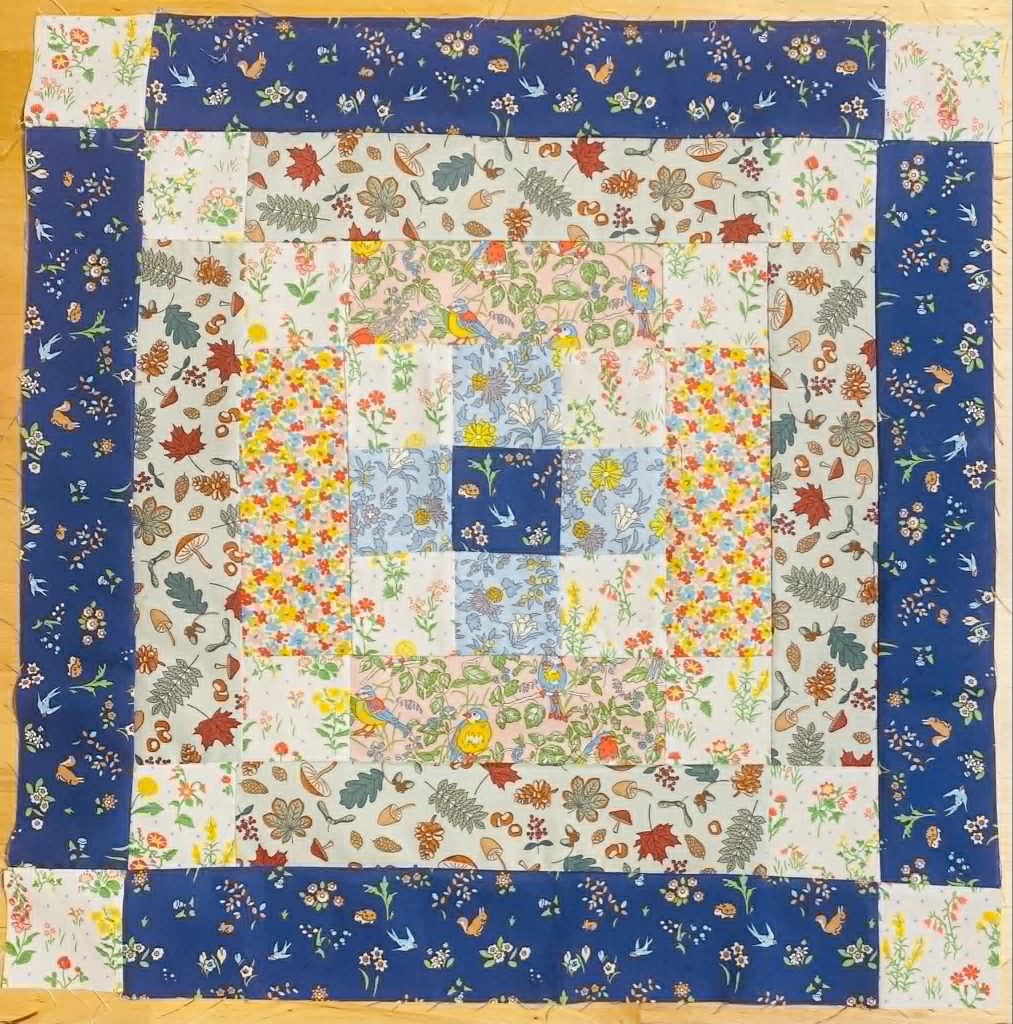
 This pillow is made with the Woodland Walk Collection by Liberty Of London, finishes at 18 inch Square. and uses 2.5 inch strips. 

 This is a great block for small pieces in your stash and can be made into quilt blocks, pillows etc.

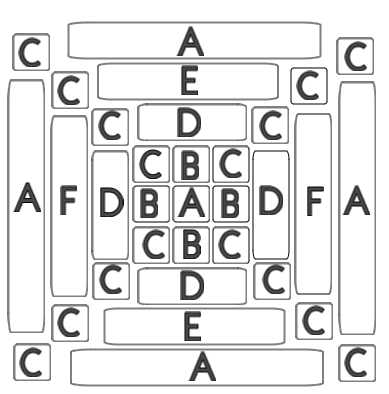
The Chart:

B: (4) 2.5 inch square

C: (16) 2.5 inch square

D: (4) 2.5 x 6.5 inch

E: (2) 2.5 x 10.5 inch

F: (2) 2.5 x 10.5 inch

To Sew:

Make the 9 patch in the center:

Sew together 2 sets of CBC and 1 set BAB.

Sew to form the 9 patch center.  

Sew 2 sets of CDC

Sew 2 D strips to the side of the 9 patch.

Sew the two CDC strips to the top & Bottom

Sew 2 sets of CEC

Sew 2 F strips to the side of the 9 patch.

Sew the two CEC strips to the top & Bottom

Sew 2 sets of CAC

Sew 2 A strips to the side of the 9 patch.

Sew the two CAC strips to the top & Bottom

Get creative and use more or less then 6 prints

Have fun sewing! Vall

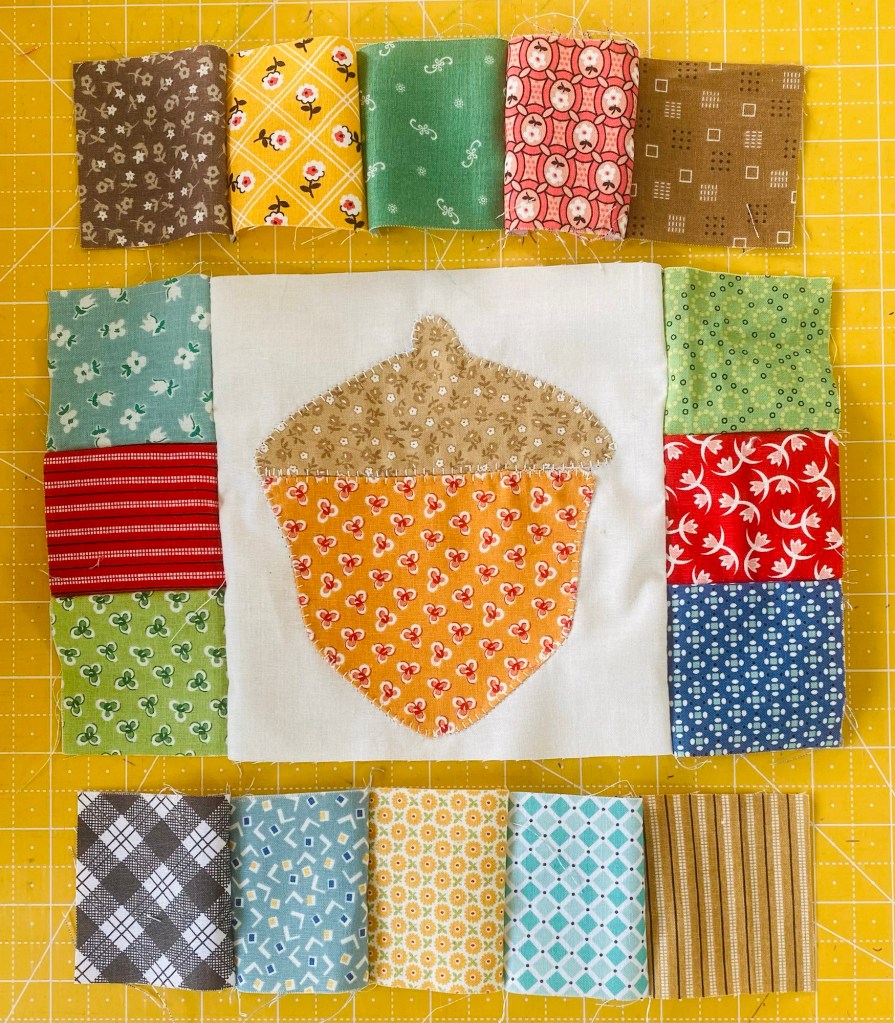
Scappy Applique Block

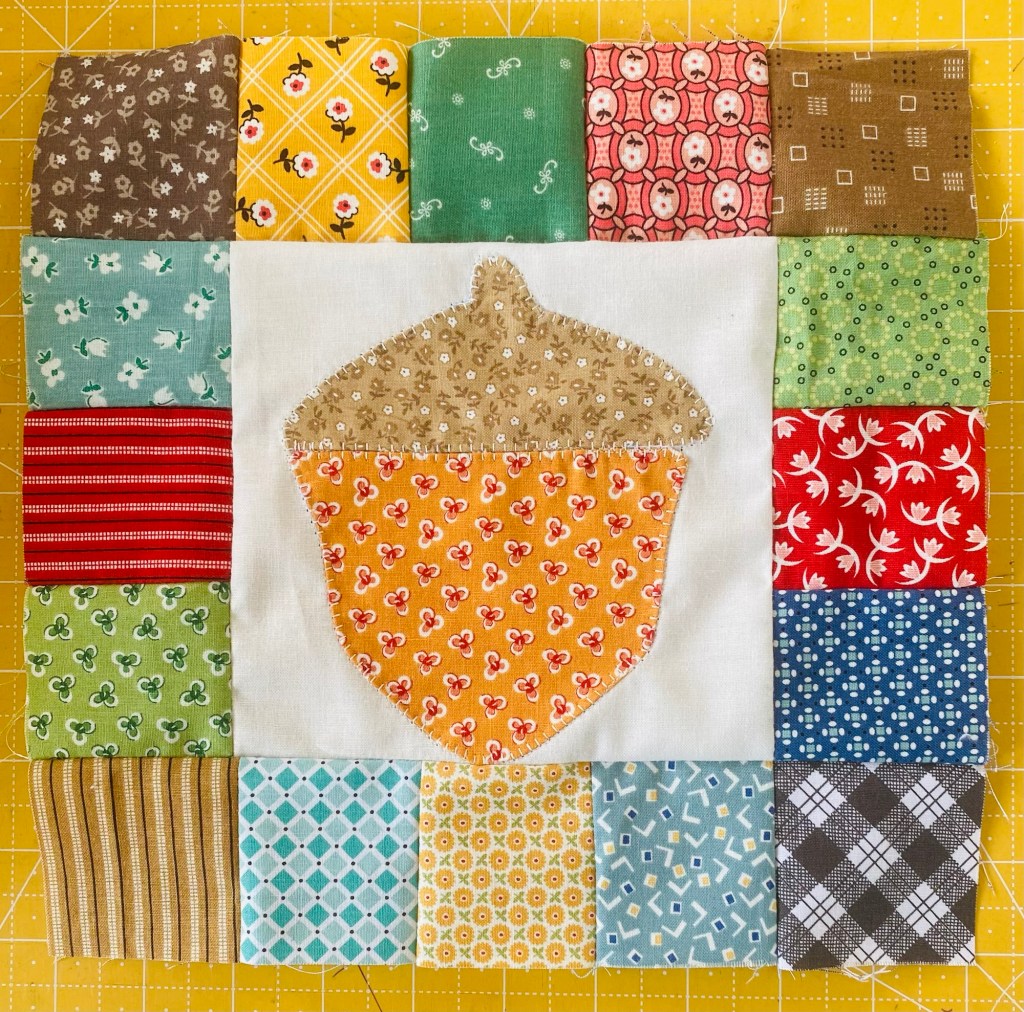
How to make a fun 10 inch patchwork block


You will need:

6.5 inch square for the centre 

16. 2.5 inch squares for the sides

An appliqué of your choice for the centre 

First using your favourite appliqué method, sew the appliqué to the center of the 6.5 inch square. You can also do an embroidery.

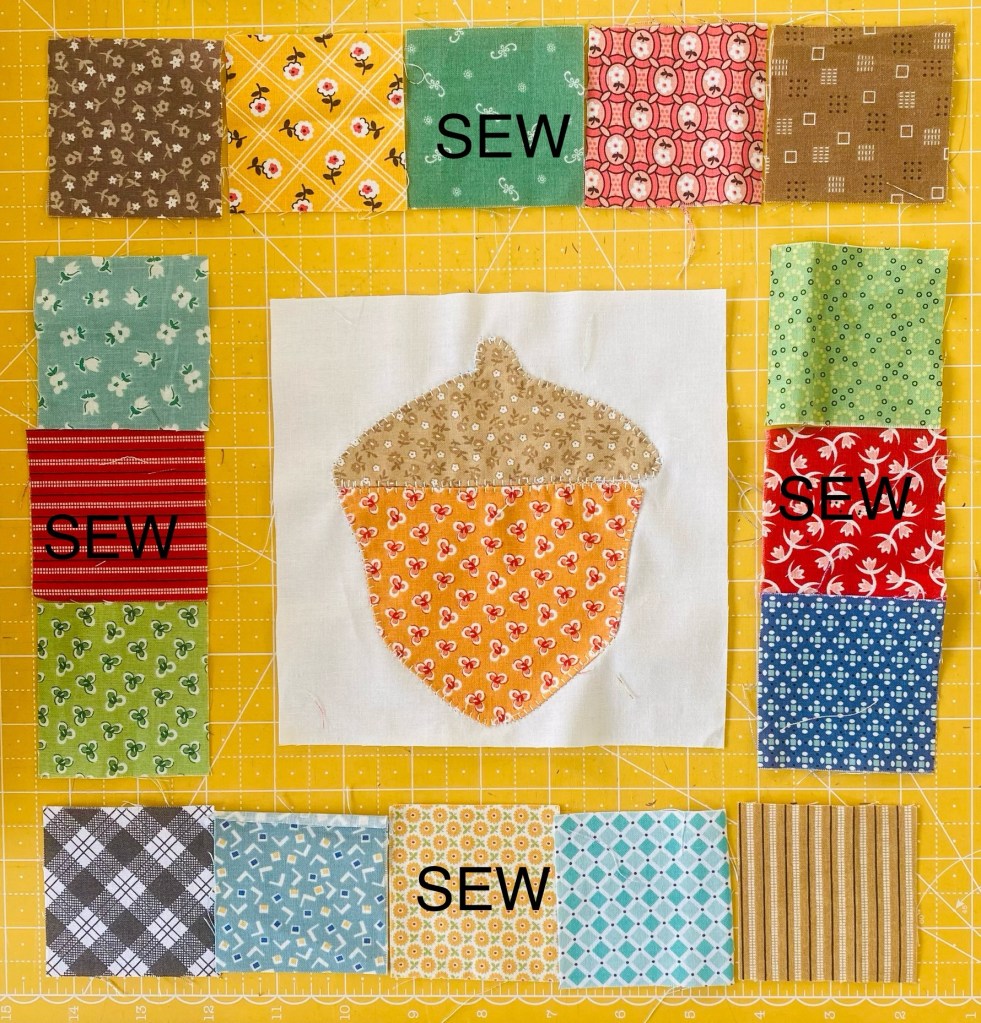
Place the 2.5 blocks around the 6.5 inch square so there are three along each side and one at each corner

Sew the sections laid out in the above picture
Sew the side strips to the centre block. Then sew the top & bottom strips

The blocks done! Use it as a quilt block, pot holder, make several and put together as a runner or quilt.

Happy sewing! Vall

Log Cabin Block - 11 inch

 I love making scrappy log cabin blocks. They can be used on their own as pot holders, mug mats or pillows, or made into quilts. 

Log cabin blocks are very versatile and y to play with. They start with a centre and work around the centre with strips. You can start on the top, side or bottom, you can use the same width strips or strips of different widths. This one is a pretty standard. 

Before you ask why the letters for the strips are not in order, the program I use sets the letters, not me.. 

F: 3.5 inch square
D: 2.5 x 3.5 strip
E: 2.5 x 5.5 inch strip (need 2)
B: 2.5 x 7.5 inch strip (need 2)
C: 2.5 x 9.5 inch strip (need 2)
A: 2.5 x 11.5 inch strip
Sew D onto F
Sew E to the bottom
Sew E to the side 
Sew B to the top
Sew B to the side
Sew C to the bottom
Sew C to the side
Sew A on the top
Finished. 

You can keep going and make it bigger if you would like. 

Make sure to iron after sewing each strip and use a 1/4 inch foot. 

Have fun making these into quilts, pillows, pot holders etc. 

Friday, 6 March 2026

 Hidden Cottage Quilt

Ive named this after the material line I used for the quilt. Its quite simple and would be a great quilt to use up scraps

I used per block:

4 inch block for the centre
(4) 2x4x inch strips for the sides
(4) 2 inch squares for the corners
Finished block is 7 inches


I made up 30 blocks 
Matching up sets:


Ready to sew!


To make a kids quilt, sew 5 blocks in a row. 
Optional: I put a row of sashing in between each row

Then sew the rows together & quilt as desired.
 

Tuesday, 11 June 2019

Squared Hexi Block


The Squared Hexagon Block

These make really nice pot holders, table runners, a quilt block or just something nice for the wall


I used 1/12 inch hexagon papers, any size works.
You will need:
Method A: 20 x hexagons (Cut 3 hexagons in half to make 6 half hexagons)
Method B: 17 hexagons, 6 half hexagons


  Take 6 hexagons, using a ruler mark them as pictured


Cut on the line and you will have 6 stubby hexagons and 6 paper bits. You won't need the bits.


Take 4 of the half hexagons and mark them as pictured above


Cut, save the large bits, toss the little ends. 


You will now have all the pieces. Start planning your project, Make your center hexi flower and add the sides.


Ta-Da! 

To make a sweet pot holder:

You will need: 
The finished squared hex block
Backing measuring 12"x12", 
Batting measuring 10 1/4" x 10 1/4"
Thread matching the backing
Iron
Sewing machine

The binding is included in the backing.


Remove papers, iron the edges inward.


Lay your backing wrong side up, batting in the center and squared hexi block on top. make sure you have 3/4" of backing all the way around the block. 


Pin and quilt how you like. I stitch in the ditch around the flower and the center hexi.
Fold the backing so the edges touches the edge of the hexi block.


Fold the binding over the hexi block and pin or clip. I find its easier to do this one edge at a time so the finished piece sits nice and flat. 


Sew close to the edge. Repeat for the other three sides


Finished :D